
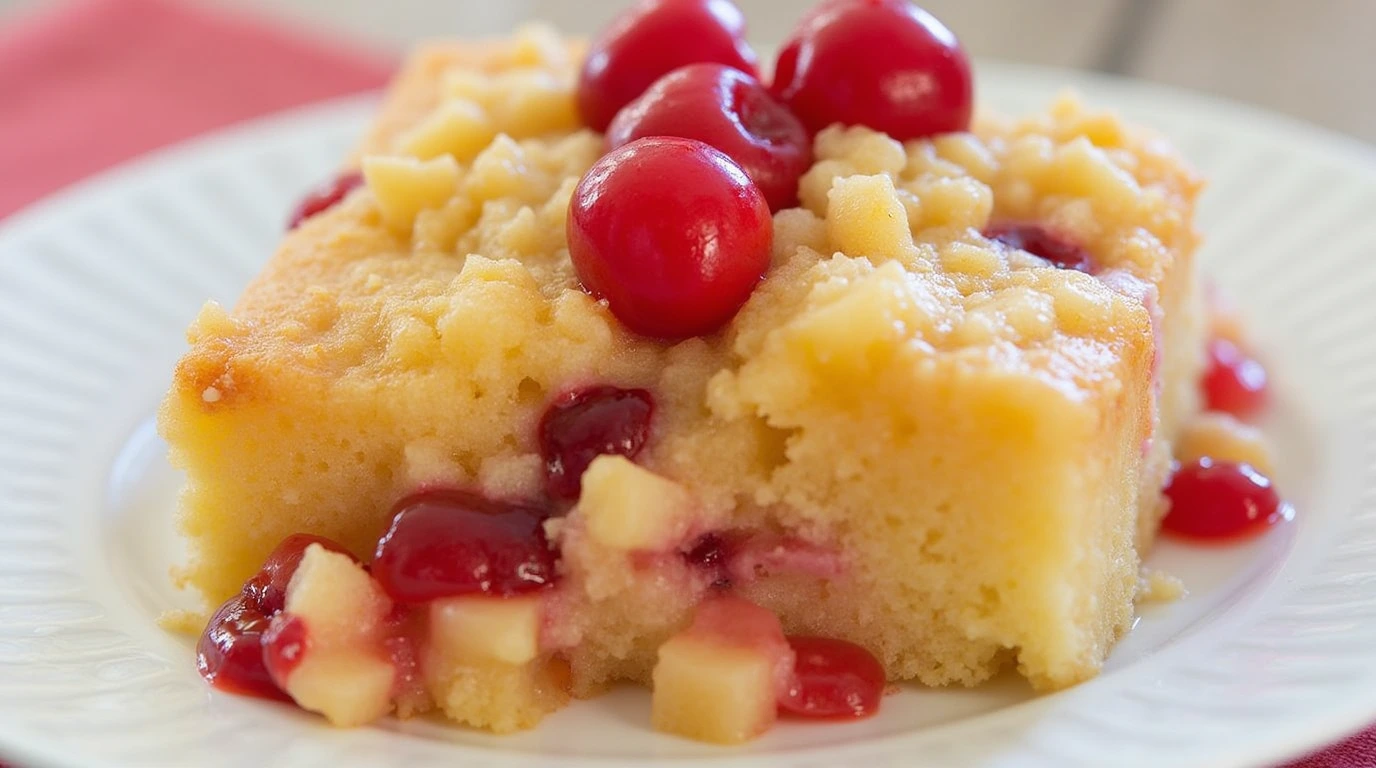
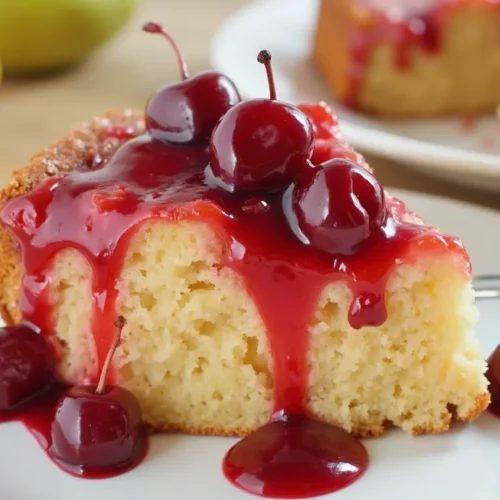
Need a dessert that’s easy and delicious? Let me show you how to make Cherry Pineapple Dump Cake—a no-fuss, crowd-pleasing treat perfect for busy weeknights, potlucks, or last-minute cravings! With sweet-tangy flavors, a golden crust, and minimal prep, it’s a lifesaver for hassle-free baking.
Imagine juicy cherry pie filling paired with tropical pineapple, topped with a buttery, crumbly cake mix. Irresistible, right? Whether you’re a beginner or a pro, this dump-and-bake recipe delivers maximum flavor with minimal effort—and it’s endlessly customizable!
Table of Contents
Why You’ll Love This Recipe
If you’ve ever wished for a dessert that’s both effortless and unforgettable, this Cherry Pineapple Dump Cake is about to become your new go-to! Here’s why this recipe is a total game-changer:
- Quick and Easy: No fancy techniques or hours in the kitchen—just layer, bake, and enjoy! Perfect for busy days or when you need a last-minute dessert that still feels special.
- Minimal Ingredients: With just a handful of pantry staples like cherry pie filling, canned pineapple, and boxed cake mix, you can create a dessert that tastes like you spent all day baking.
- Crowd-Pleasing Flavor: The sweet-tart combo of cherries and pineapple, topped with a buttery, golden crust, is a guaranteed hit with both kids and adults.
- Beginner-Friendly: Whether you’re a baking novice or a seasoned pro, this dump-and-bake method is foolproof and stress-free.
- Versatile and Customizable: Love experimenting? This recipe is a blank canvas for your creativity—swap fruits, add toppings, or try different cake mixes to make it your own.
But what really sets this dessert apart is how it brings people together. Picture this: a warm, bubbling cake fresh from the oven, served with a scoop of vanilla ice cream melting into every bite. It’s the kind of treat that sparks smiles and creates memories—whether it’s a cozy family dinner or a festive potluck with friends.
So, if you’re ready to whip up a dessert that’s as easy as it is delicious, let’s get started! Trust me, once you try this Cherry Pineapple Dump Cake, it’ll earn a permanent spot in your recipe rotation.
Ingredients You’ll Need for Cherry Pineapple Dump Cake
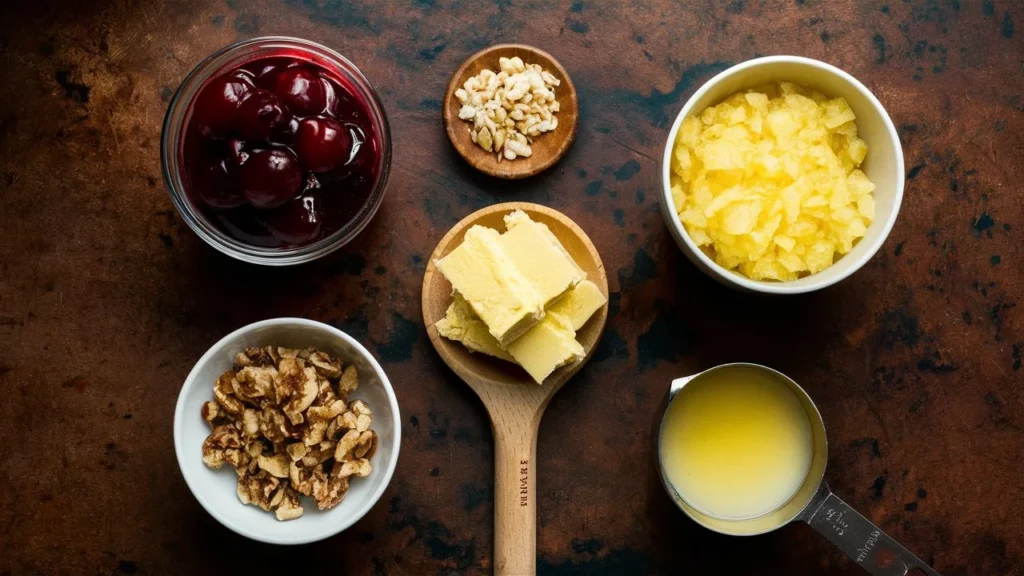
Let’s talk ingredients! One of the best things about this Cherry Pineapple Dump Cake is how simple and accessible the ingredients are. You likely already have most of them in your pantry or can easily grab them on your next grocery run. Here’s what you’ll need:
- 1 can (21 oz) cherry pie filling – The star of the show, bringing that sweet-tart cherry flavor we all love.
- 1 can (20 oz) crushed pineapple (undrained) – Adds a tropical twist and keeps the cake moist and juicy.
- 1 box (15.25 oz) yellow cake mix – The base for that irresistible golden crust. Feel free to swap with white or butter pecan cake mix for a fun variation!
- 1/2 cup (1 stick) unsalted butter, melted – Creates that rich, buttery topping we can’t get enough of.
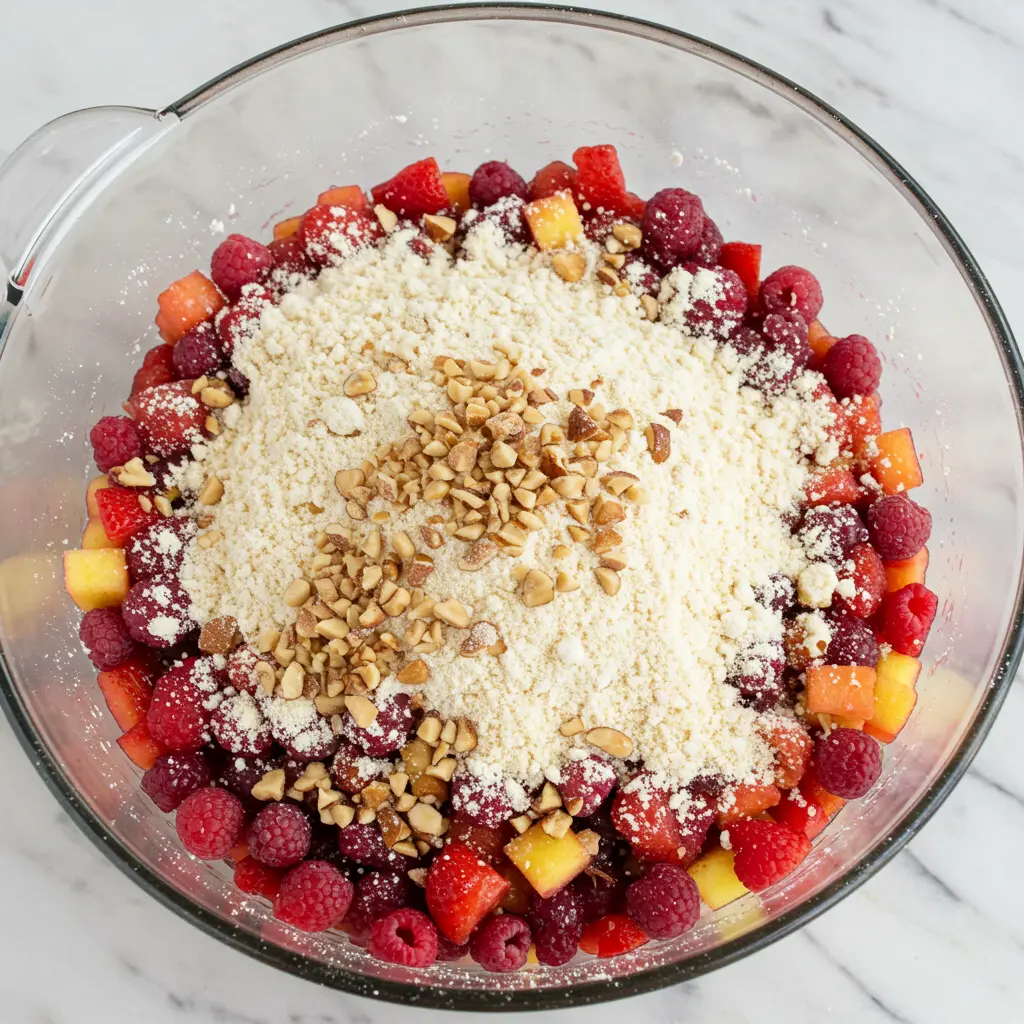
- Optional: 1/2 cup chopped nuts (pecans or walnuts) – For a little crunch and extra flavor.
This short list of ingredients is all you need to create a dessert that’s both comforting and impressive. Now that we’ve got everything ready, let’s move on to the fun part—putting it all together!
Step-by-Step Instructions
Ready to make magic happen? This Cherry Pineapple Dump Cake is as easy as 1-2-3, and I’ll walk you through every step. Let’s get baking!
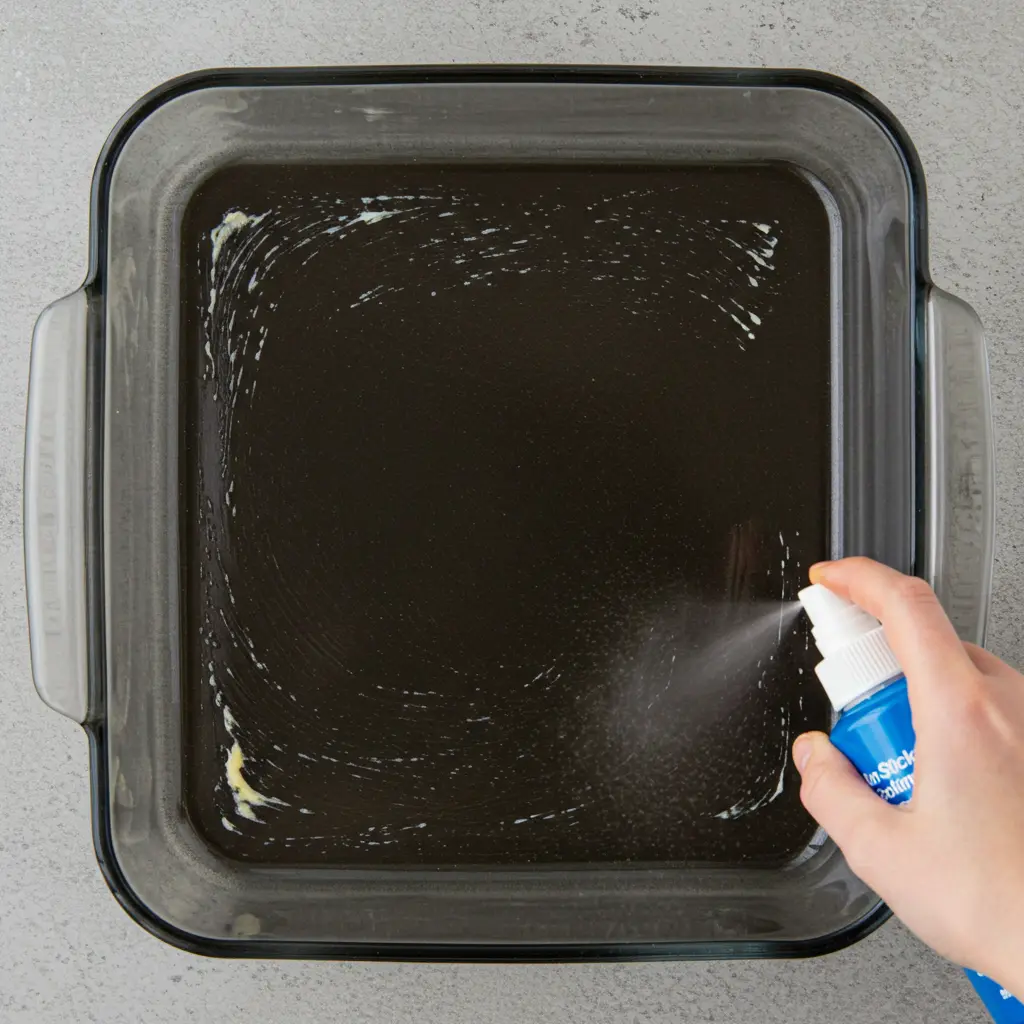
Step 1: Prep Your Pan and Preheat
- Preheat your oven to 350°F (175°C).
- Grab a 9×13-inch baking dish and lightly grease it with butter or non-stick spray. This ensures your cake won’t stick and makes cleanup a breeze.
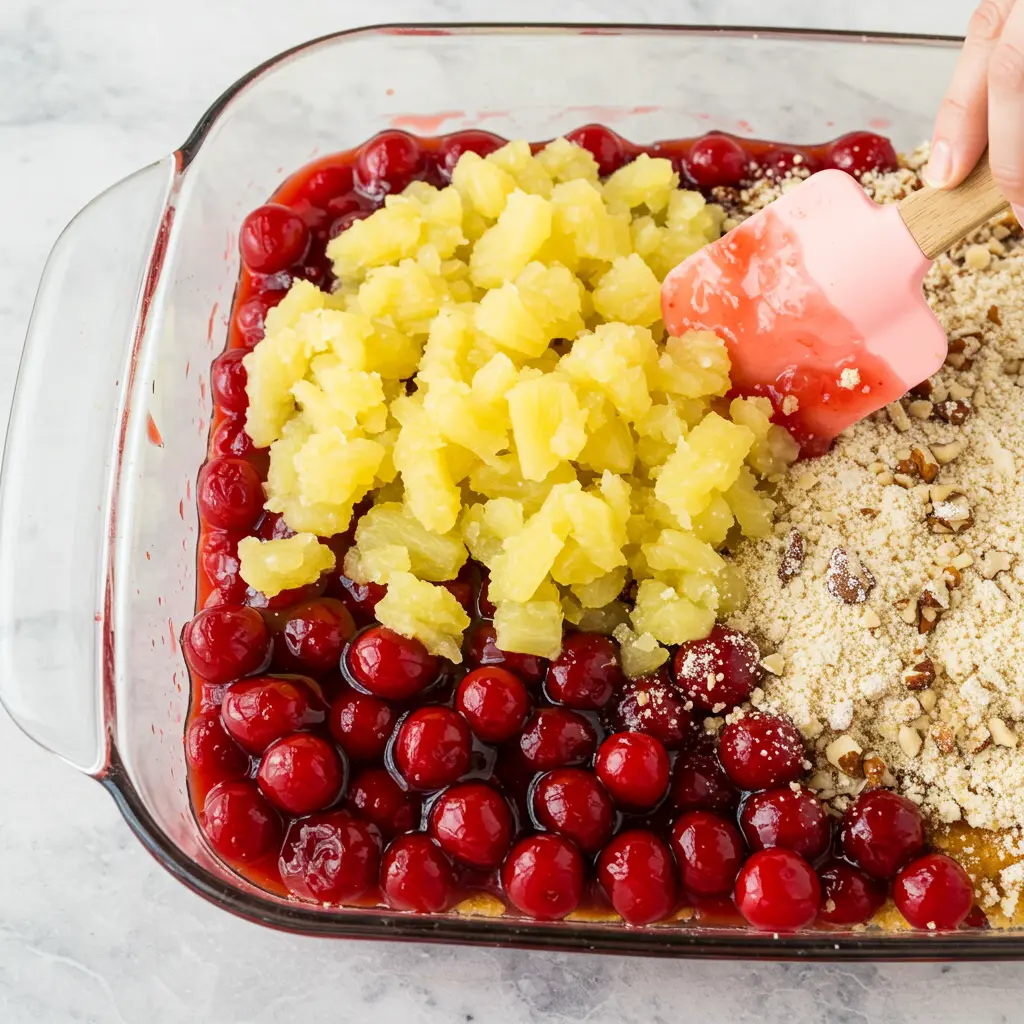
Step 2: Layer the Fruit
- Spread the cherry pie filling evenly across the bottom of the dish.
- Next, pour the crushed pineapple (with its juice) over the cherries. Use a spatula or spoon to gently spread it into an even layer.
Step 3: Add the Cake Mix
- Sprinkle the dry cake mix evenly over the fruit layer. No need to stir—just let it sit like a fluffy blanket on top.
- For extra texture and flavor, sprinkle chopped nuts (if using) over the cake mix.
Step 4: Drizzle the Butter
- Slowly drizzle the melted butter over the cake mix. Try to cover as much of the surface as possible—this creates that golden, crumbly topping we all love.
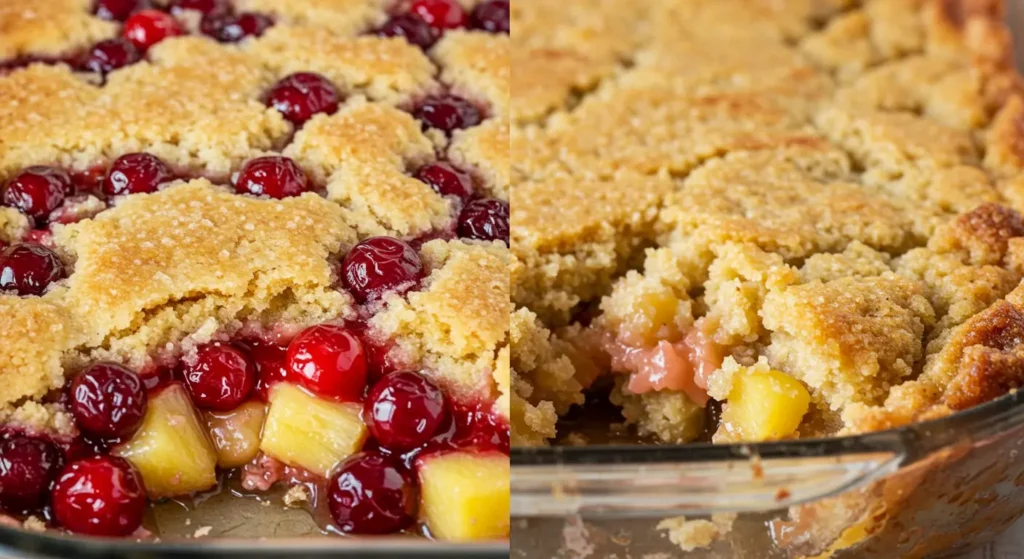
Step 5: Bake to Perfection
- Pop the dish into the preheated oven and bake for 45-50 minutes, or until the top is golden brown and the fruit filling is bubbling around the edges.
Step 6: Cool and Serve
- Let the cake cool for about 10-15 minutes before serving. This allows the flavors to settle and makes it easier to slice.
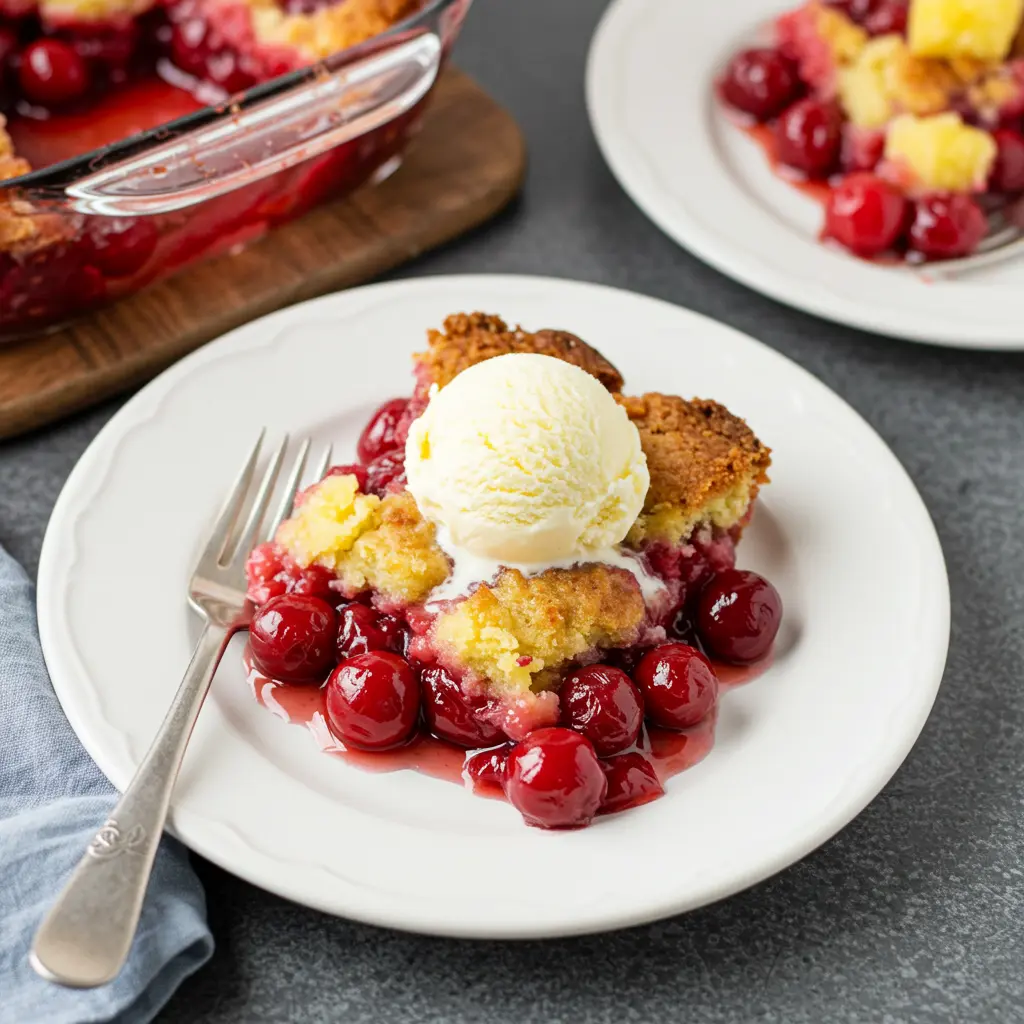
- Serve warm with a scoop of vanilla ice cream or a dollop of whipped cream for the ultimate indulgence.
Tips for Success & Common Mistakes to Avoid
Even though this Cherry Pineapple Dump Cake is incredibly forgiving, a few expert tips can take your dessert from good to great. Here’s how to ensure perfect results every time—plus, how to steer clear of common pitfalls:
Tips for Success:
- Even Layering is Key:
- Spread the cherry pie filling and crushed pineapple evenly across the dish. This ensures every bite has the perfect balance of sweet and tangy flavors.
- Don’t Skip the Butter:
- The melted butter is what creates that irresistible golden crust. Make sure to drizzle it evenly to avoid dry patches of cake mix.
- Use Room Temperature Ingredients:
- If your butter is too cold, it won’t distribute well. Melt it gently in the microwave or on the stovetop before drizzling.
- Check for Doneness:
- The cake is ready when the top is golden brown and the edges are bubbling. If the top browns too quickly, loosely cover it with foil to prevent burning.
- Let It Rest:
- Allow the cake to cool for 10-15 minutes before serving. This helps the layers set and makes it easier to slice.
Common Mistakes to Avoid:
- Overmixing the Layers:
- Remember, this is a dump cake! There’s no need to stir the layers—just layer, sprinkle, and drizzle. Overmixing can lead to a dense texture.
- Draining the Pineapple:
- The juice from the canned pineapple adds moisture and flavor. Draining it can result in a dry cake.
- Using Cold Butter:
- Cold butter won’t distribute evenly, leaving dry spots of cake mix. Always melt it before drizzling.
- Skipping the Grease:
- Forgetting to grease your baking dish can make serving a sticky mess. A quick spray or butter coating saves the day!
- Overbaking:
- Keep an eye on the cake during the last 10 minutes of baking. Overbaking can dry out the topping and make the edges too crispy.
Bonus Tip: Storage and Reheating
- Storing Leftovers: Cover the dish with plastic wrap or transfer slices to an airtight container. It will stay fresh in the fridge for up to 3 days.
- Reheating: Warm individual slices in the microwave for 15-20 seconds or in the oven at 300°F (150°C) for 10 minutes.
With these tips in your back pocket, you’re all set to bake a Cherry Pineapple Dump Cake that’s flawless every time. Now, let’s explore some fun variations to keep things exciting!
Variations to Customize Your Cherry Pineapple Dump Cake
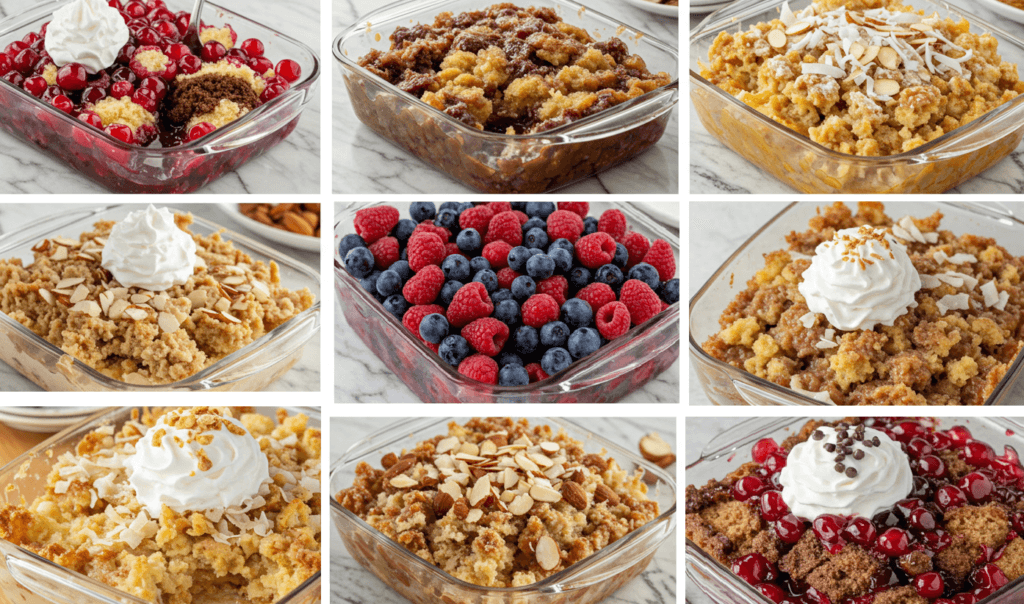
One of the best things about this Cherry Pineapple Dump Cake is how easy it is to customize! Whether you’re craving something chocolaty, nutty, or fruity, these variations let you put your own spin on the classic recipe. Here are 5 delicious twists to try:
1. Chocolate Cherry Dump Cake
- Swap the yellow cake mix for a chocolate cake mix.
- Use cherry pie filling as the base layer and skip the pineapple for a rich, decadent dessert that’s perfect for chocolate lovers.
2. Gluten-Free Cherry Pineapple Dump Cake
- Replace the regular cake mix with a gluten-free yellow or white cake mix.
- Double-check that the cherry pie filling and butter are gluten-free. This version is just as delicious and inclusive for those with dietary restrictions.
3. Tropical Coconut Cherry Dump Cake
- Add 1/2 cup shredded coconut to the cake mix layer for a tropical twist.
- Keep the cherry and pineapple layers for a sweet, tangy, and coconutty flavor combo that’s like a vacation in every bite.
4. Cherry Almond Dump Cake
- Sprinkle 1/2 cup sliced almonds over the cake mix before drizzling the butter.
- Add 1/2 teaspoon almond extract to the cherry pie filling for a nutty, aromatic flavor that pairs beautifully with the fruit.
5. Berry Bliss Dump Cake
- Replace the cherry pie filling with mixed berry pie filling (blueberry, strawberry, or raspberry).
- Keep the pineapple layer for a vibrant, fruity dessert that’s bursting with flavor.
Pro Tip:
Feel free to mix and match these ideas or create your own variation! The beauty of this recipe is its flexibility—so don’t be afraid to get creative.
With these variations, you can enjoy a new twist on this classic dessert every time you make it. Now, let’s tackle some frequently asked questions to clear up any doubts and make your baking experience even smoother!
FAQs
Got questions? I’ve got answers! Here are some of the most common questions about making this Cherry Pineapple Dump Cake, along with practical tips to ensure your baking experience is as smooth as possible.
What is a substitute for maraschino cherries in pineapple upside-down cake?
If you don’t have maraschino cherries, you can use fresh or frozen cherries, dried cherries, or even cranberries for a tart twist. For a non-cherry option, try sliced strawberries or raspberries to complement the pineapple.
Can I use pineapple juice instead of water in a cake mix?
Absolutely! Using pineapple juice instead of water adds extra flavor and moisture to the cake. Just replace the water with an equal amount of pineapple juice for a tropical boost
What makes a cake more moist: milk or water?
Milk generally makes cakes more moist and rich compared to water because of its fat content. If you want to enhance the moisture in your dump cake, consider using milk instead of water in the cake mix (if the mix calls for liquid).
Can you use parchment paper when baking a pineapple upside-down cake?
Yes, you can! Lining the bottom of your baking dish with parchment paper makes it easier to flip the cake and achieve that beautiful caramelized topping. Just grease the parchment paper lightly to prevent sticking.
Is oil or butter better for cakes?
It depends on the texture you’re going for! Butter adds richness and flavor, while oil tends to make cakes moister and softer. For this dump cake, butter is recommended for its flavor and ability to create a golden, crumbly topping.
Chef’s Note
This Cherry Pineapple Dump Cake is one of those recipes you’ll turn to again and again. It’s not just about how easy it is to make—it’s about the joy it brings to the table. Here are a few final thoughts to help you make the most of this dessert:
Why This Recipe Works
- Simplicity Meets Flavor: The combination of sweet cherries, tangy pineapple, and buttery cake mix is a match made in dessert heaven. It’s proof that you don’t need complicated techniques to create something truly delicious.
- Versatility: Whether you’re serving it at a family dinner, a potluck, or just treating yourself, this cake fits every occasion.
A Few Personal Tips
- Serve It Warm: The warm, gooey filling paired with a scoop of vanilla ice cream is pure comfort food.
- Make It Your Own: Add a sprinkle of cinnamon, a handful of nuts, or even a drizzle of caramel sauce to make it uniquely yours.
A Little Story
I first made this cake for a last-minute potluck, and it was such a hit that it’s now a staple in my recipe collection. It’s the kind of dessert that brings people together—simple, comforting, and full of flavor. I hope it becomes a favorite in your home too!
Cherry Pineapple Dump Cake
Ingredients
- 21 oz cherry pie filling
- 20 oz crushed pineapple undrained
- 15 oz yellow cake mix
- ½ cup unsalted butter melted
- ½ cup chopped nuts (Optional) pecans or walnuts
Instructions
- Preheat the Oven: Set your oven to 350°F (175°C) and lightly grease a 9×13-inch baking dish.
- Layer the Fruit: Spread the cherry pie filling evenly across the bottom of the dish. Pour the crushed pineapple (with its juice) over the cherries and spread into an even layer.
- Add the Cake Mix: Sprinkle the dry cake mix evenly over the fruit layer. If using, sprinkle chopped nuts on top
- Drizzle the Butter: Slowly drizzle the melted butter over the cake mix, covering as much of the surface as possible.
- Bake: Place the dish in the preheated oven and bake for 45-50 minutes, or until the top is golden brown and the edges are bubbling
- Cool and Serve: Let the cake cool for 10-15 minutes before serving. Enjoy warm with a scoop of vanilla ice cream or a dollop of whipped cream
Notes
- Storage: Store leftovers in an airtight container in the fridge for up to 3 days. Reheat in the microwave or oven before serving.
- Freezing: Wrap the cooled cake tightly and freeze for up to 2 months. Thaw in the fridge overnight and reheat before serving.
- Variations: Try using chocolate cake mix, adding shredded coconut, or swapping the cherry filling for mixed berries
Cooked It? Crushed It? Review It!
There are no reviews yet. Be the first one to write one.